RDI on Redis Cloud quick start
Learn how to create a data pipeline between a PostgreSQL source database created with Terraform and a Redis Cloud target database.
| Redis Cloud |
|---|
The rdi-cloud-automation GitHub repository contains a Terraform script that quickly sets up a PostgreSQL source database on an EC2 instance and all required permissions and network setup to connect it to a Redis Cloud target database.
Prerequisites
To follow this guide, you need to:
-
Create a Redis Cloud Pro database hosted on Amazon Web Services (AWS).
Turn on Multi-AZ replication and manually select the availability zones when creating the database.
-
Install the AWS CLI and set up credentials for the CLI.
-
Install Terraform.
Create a data integration workspace
Before you can create your first Data Integration pipeline for a Redis Cloud subscription, you must first deploy the cloud infrastructure needed to host the pipeline and run the workers associated with the pipeline. In Redis Cloud, this is called a Workspace. See Create and manage Data Integration workspace for more information.
To create a Data Integration workspace for an existing Pro subscription:
-
From the Redis Cloud console, select Data Integration from the left-hand menu. If you don't have any workspaces yet, select Create workspace to go to the Create workspace page.

If you already have a workspace deployed, you'll see your current workspaces. Select New workspace to go to the Create workspace page.

You can also go to the Data Integration tab from your subscription or database page and select Create workspace to go to the Create workspace page for your subscription.
-
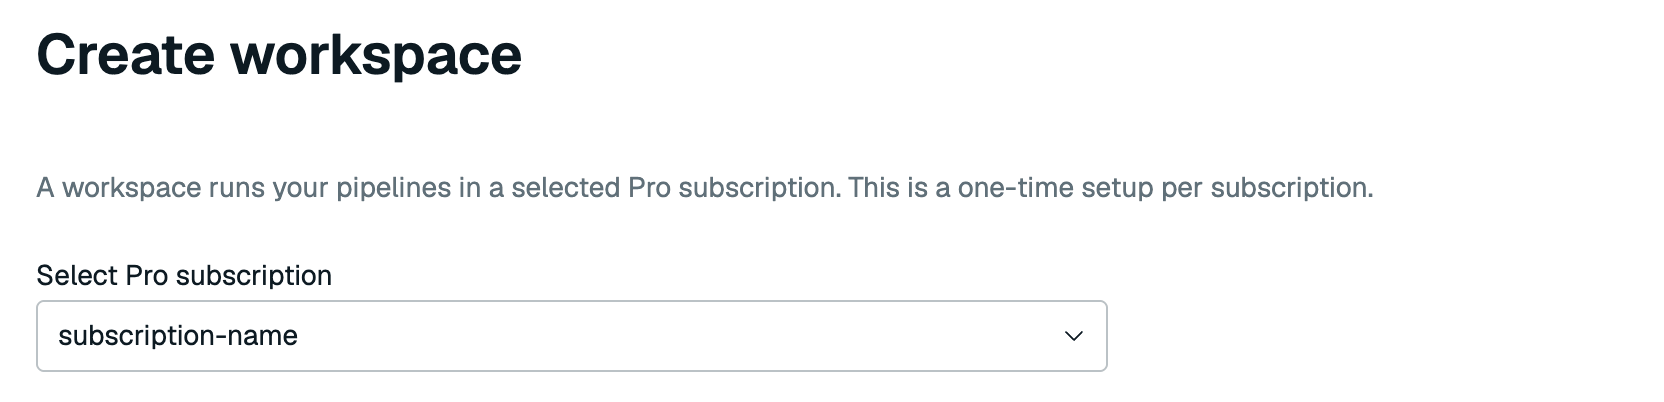
Select your Pro subscription from the list if it's not already selected.
-
A Data Integration subnet (CIDR) is automatically generated for you. Each RDI workspace uses a dedicated
/22CIDR.For AWS, the RDI workspace CIDR must:
- Be in the same RFC 1918 private address range as the subscription VPC's primary CIDR:
10.0.0.0/8,172.16.0.0/12, or192.168.0.0/16. - Not overlap with existing subscription, peering, transit gateway (TGW), application, database, or RDI workspace CIDR ranges.
For example, if the subscription VPC's primary CIDR is
10.238.252.0/24, then192.168.0.0/22is invalid because it is in a different RFC 1918 range. An unused range such as10.239.0.0/22is valid.If the automatic suggestion is missing or unsuitable, select another unused
/22CIDR in the same private range. For more information, see VPC CIDR block association restrictions.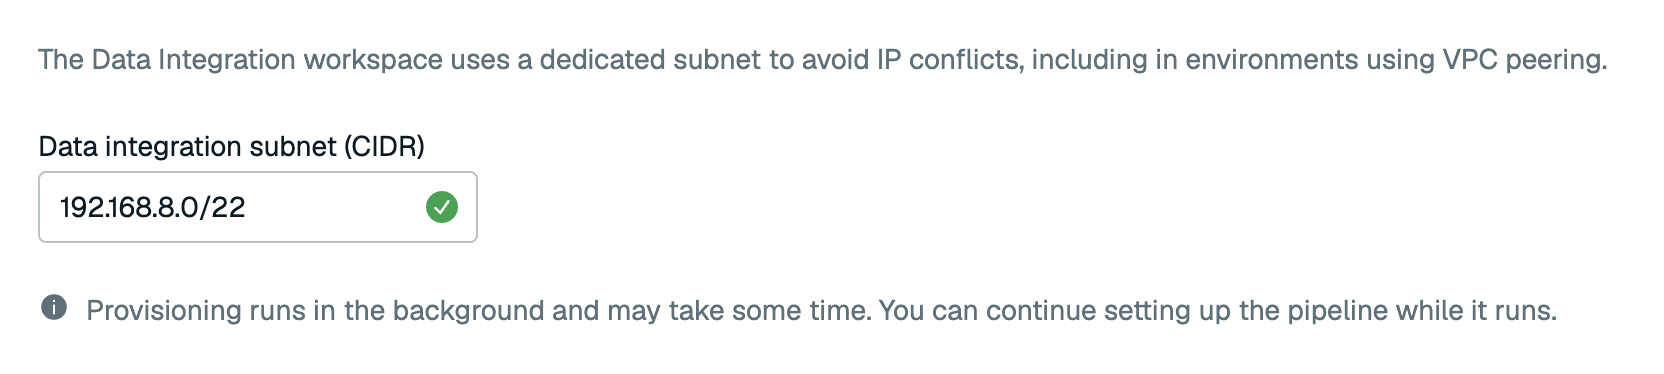
- Be in the same RFC 1918 private address range as the subscription VPC's primary CIDR:
-
Select Create workspace to create your workspace.
Your workspace will be created in the background. You can select Create pipeline to create your pipeline while the workspace is provisioning, or you can select Create pipeline later to go back to the Redis Cloud console.
Get required ARNs
This example creates one PostgreSQL source. You can add more sources after the pipeline is running.
-
On the Redis Cloud console, open your target database's Data Integration tab and select Add pipeline.

-
In Settings, select your target database and choose Hash or JSON as the default data structure, then select Continue.
-
In Add sources, select PostgreSQL.
-
Enter a Source name of your choice, for example
inventory-postgres. -
Select Continue to open Configure source.
-
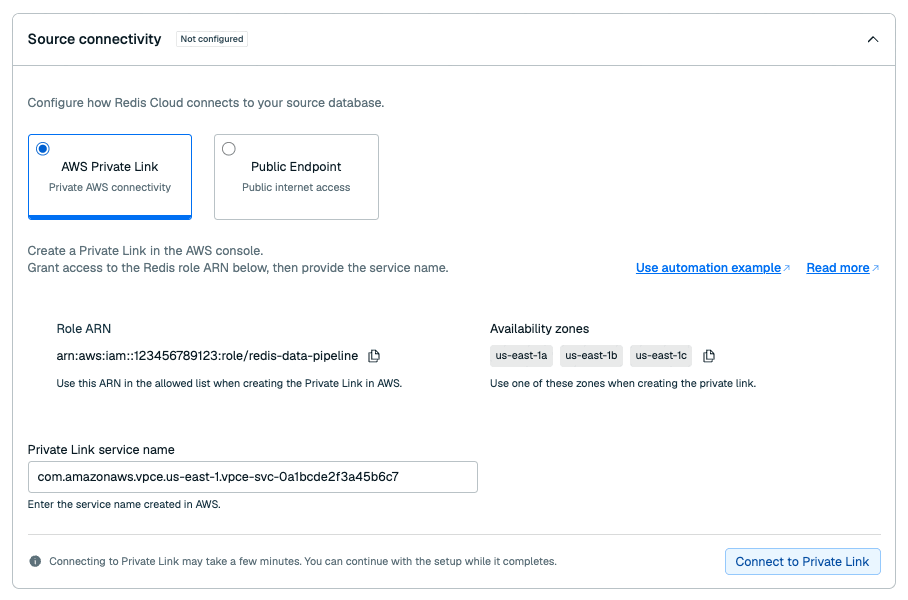
Under Source connectivity, copy the Role ARN. Use it as
redis_privatelink_arnin the Terraform configuration.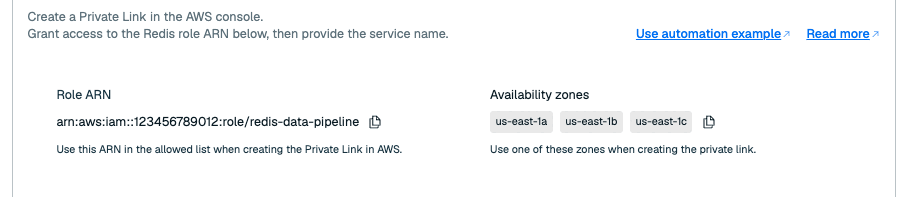
-
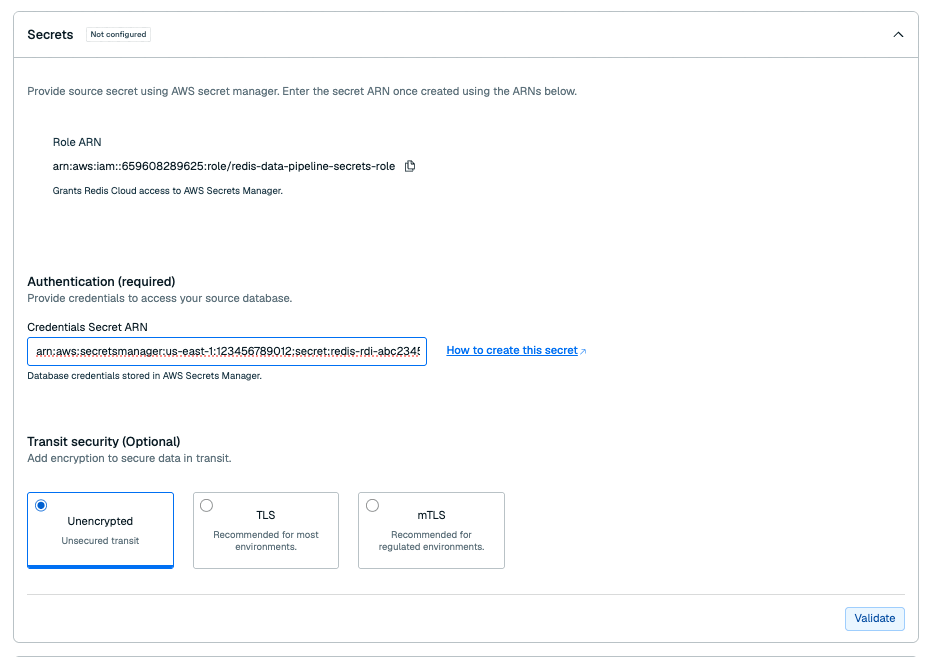
Under Secrets, copy the Role ARN. Use it as
redis_secrets_arnin the Terraform configuration.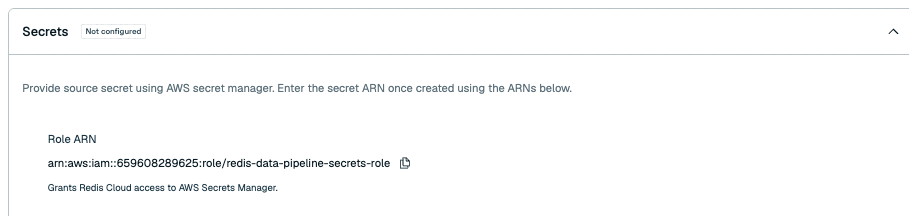
-
Select Save & exit while you create the source resources.
Create the source database and network resources
-
Clone or download the
rdi-cloud-automationGitHub repository. -
In a terminal window, go to the
examples/aws-ec2-privatelinkdirectory. -
Run
terraform initto initialize the Terraform working directory. -
Open the
example.tfvarsfile and edit the following variables:region: The AWS region where your Redis Cloud database is deployed.azs: The availability zone IDs where your Redis Cloud database is deployed.port: The port number for the new PostgreSQL source database.name: A prefix for all of the created AWS resources.redis_secrets_arn: The role ARN from Secrets in the Redis Cloud console.redis_privatelink_arn: The role ARN from Source connectivity in the Redis Cloud console.
-
To view the configuration, run:
terraform plan -var-file=example.tfvars -
To create the AWS resources, run:
terraform apply -var-file=example.tfvarsThis example creates the following resources on your AWS account:
- An AWS KMS key with the required permissions for RDI
- A VPC with a public and private subnet and all necessary route tables
- An EC2 instance running a PostgreSQL database with a security group that allows access from Redis Cloud
- An AWS Secrets Manager secret for the PostgreSQL database credentials
- A Network Load Balancer (NLB), a listener, and target group to route traffic to the EC2 instance with AWS PrivateLink
- An AWS PrivateLink endpoint service for the PostgreSQL database
Creating the AWS resources will take some time. After the resources are created, you'll be able to view them in the AWS management console.
Save the following outputs:
database: The name of the PostgreSQL database.port: The port number for the PostgreSQL database.secret_arn: The ARN of the AWS Secrets Manager secret for the PostgreSQL database credentials.vpc_endpoint_service_name: The name of the AWS PrivateLink endpoint service for the PostgreSQL database.
If you lose any outputs, run terraform output to view them again.
Resume pipeline setup
-
Return to your database's Data Integration tab in the Redis Cloud console.
-
Open the draft pipeline's actions menu and select Resume pipeline setup.
-
Open Configure source and select your PostgreSQL source in the Sources list.
-
Under Source connectivity, enter the Terraform
vpc_endpoint_service_nameoutput as the Private Link service name. -
Select Connect to Private Link and wait for connectivity to complete.
-
Under Secrets, enter the
secret_arnoutput as Credentials Secret ARN. -
Select Validate to check access to the secret.
-
Under Source configuration, enter the
databaseandportTerraform outputs in the matching fields. -
Select Test source and correct any validation errors, then select Continue.
-
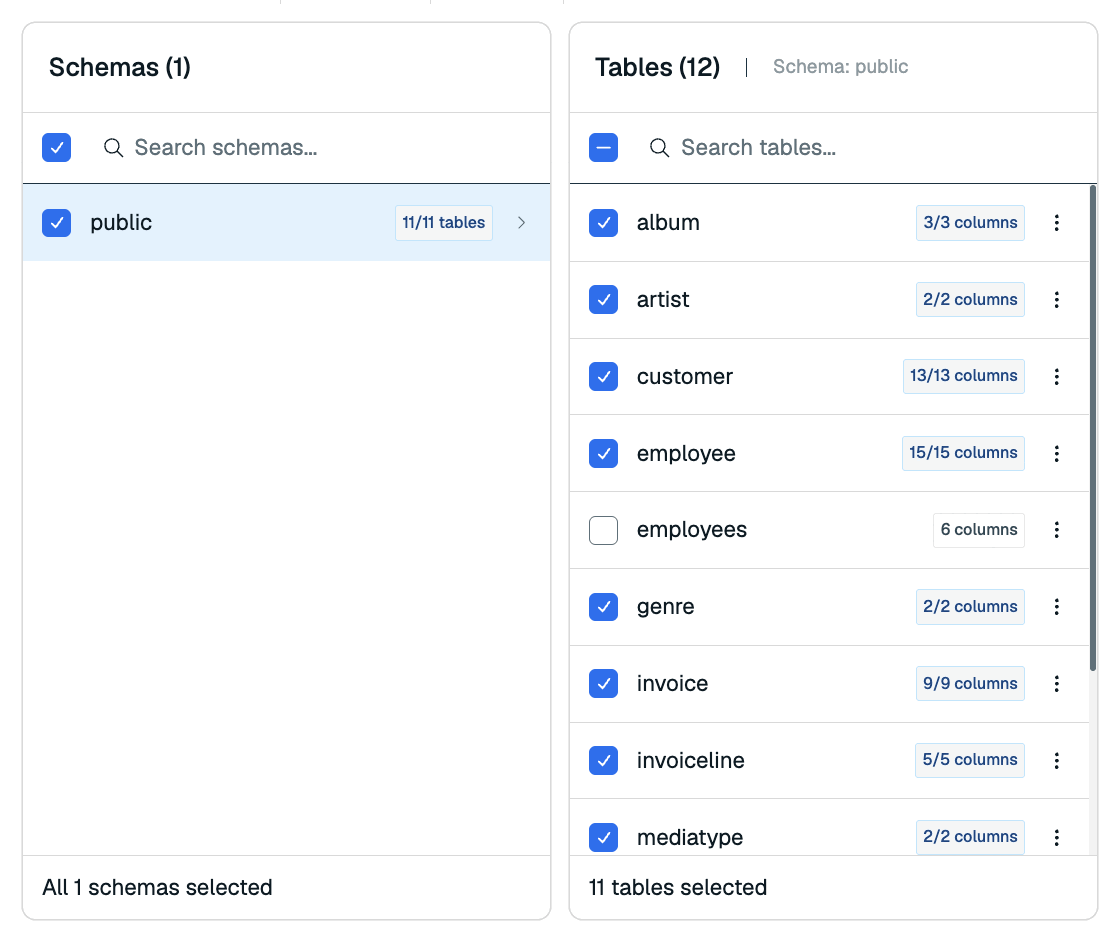
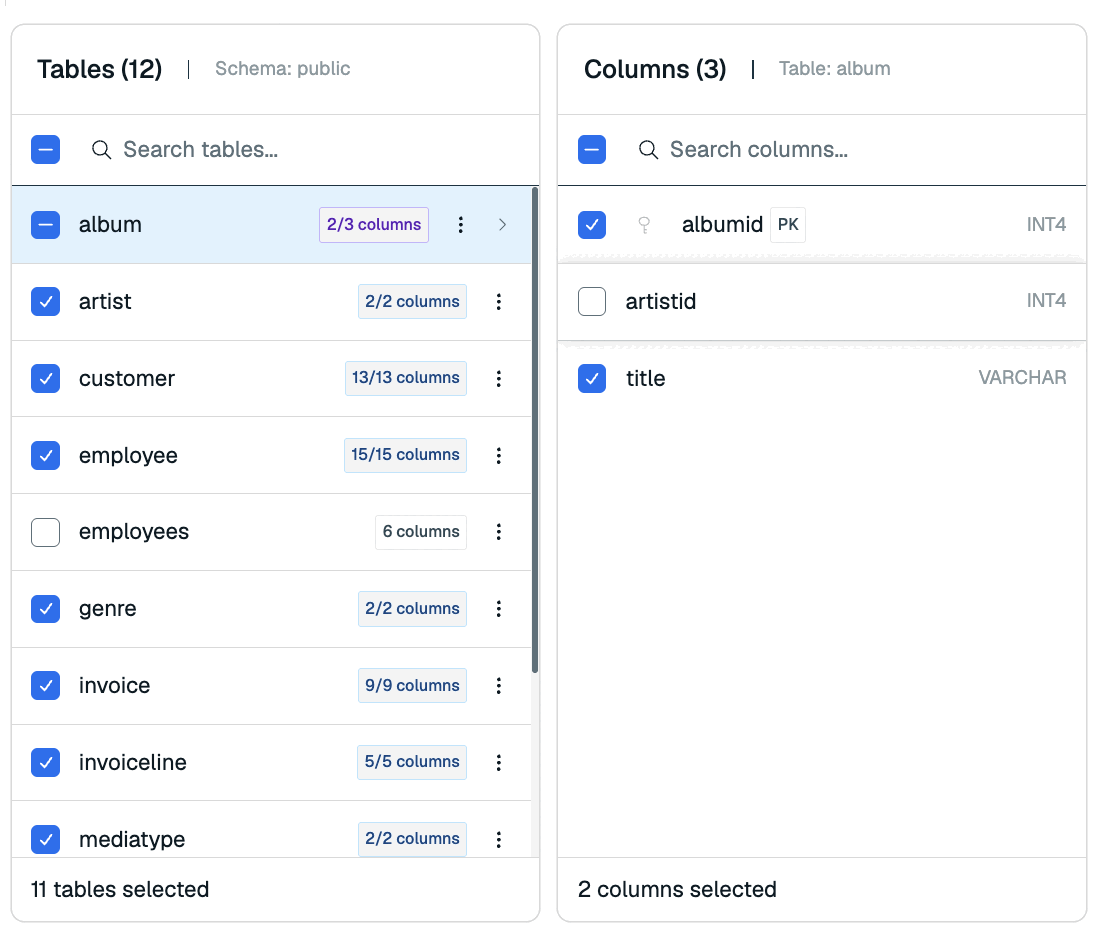
In Select data, select the schemas, tables, and columns to ingest. Review the selected key for each table.
-
Select Continue to open Add transformations. For this example, you can keep the default mapping without adding jobs.
-
Select Continue to review & deploy.
-
Review the source and target, then select Deploy pipeline.
The source first imports its selected data, then captures ongoing changes. Open the pipeline's Dashboard or Metrics tab to follow its progress.
The following example shows the metrics for one selected source in a pipeline with multiple sources.
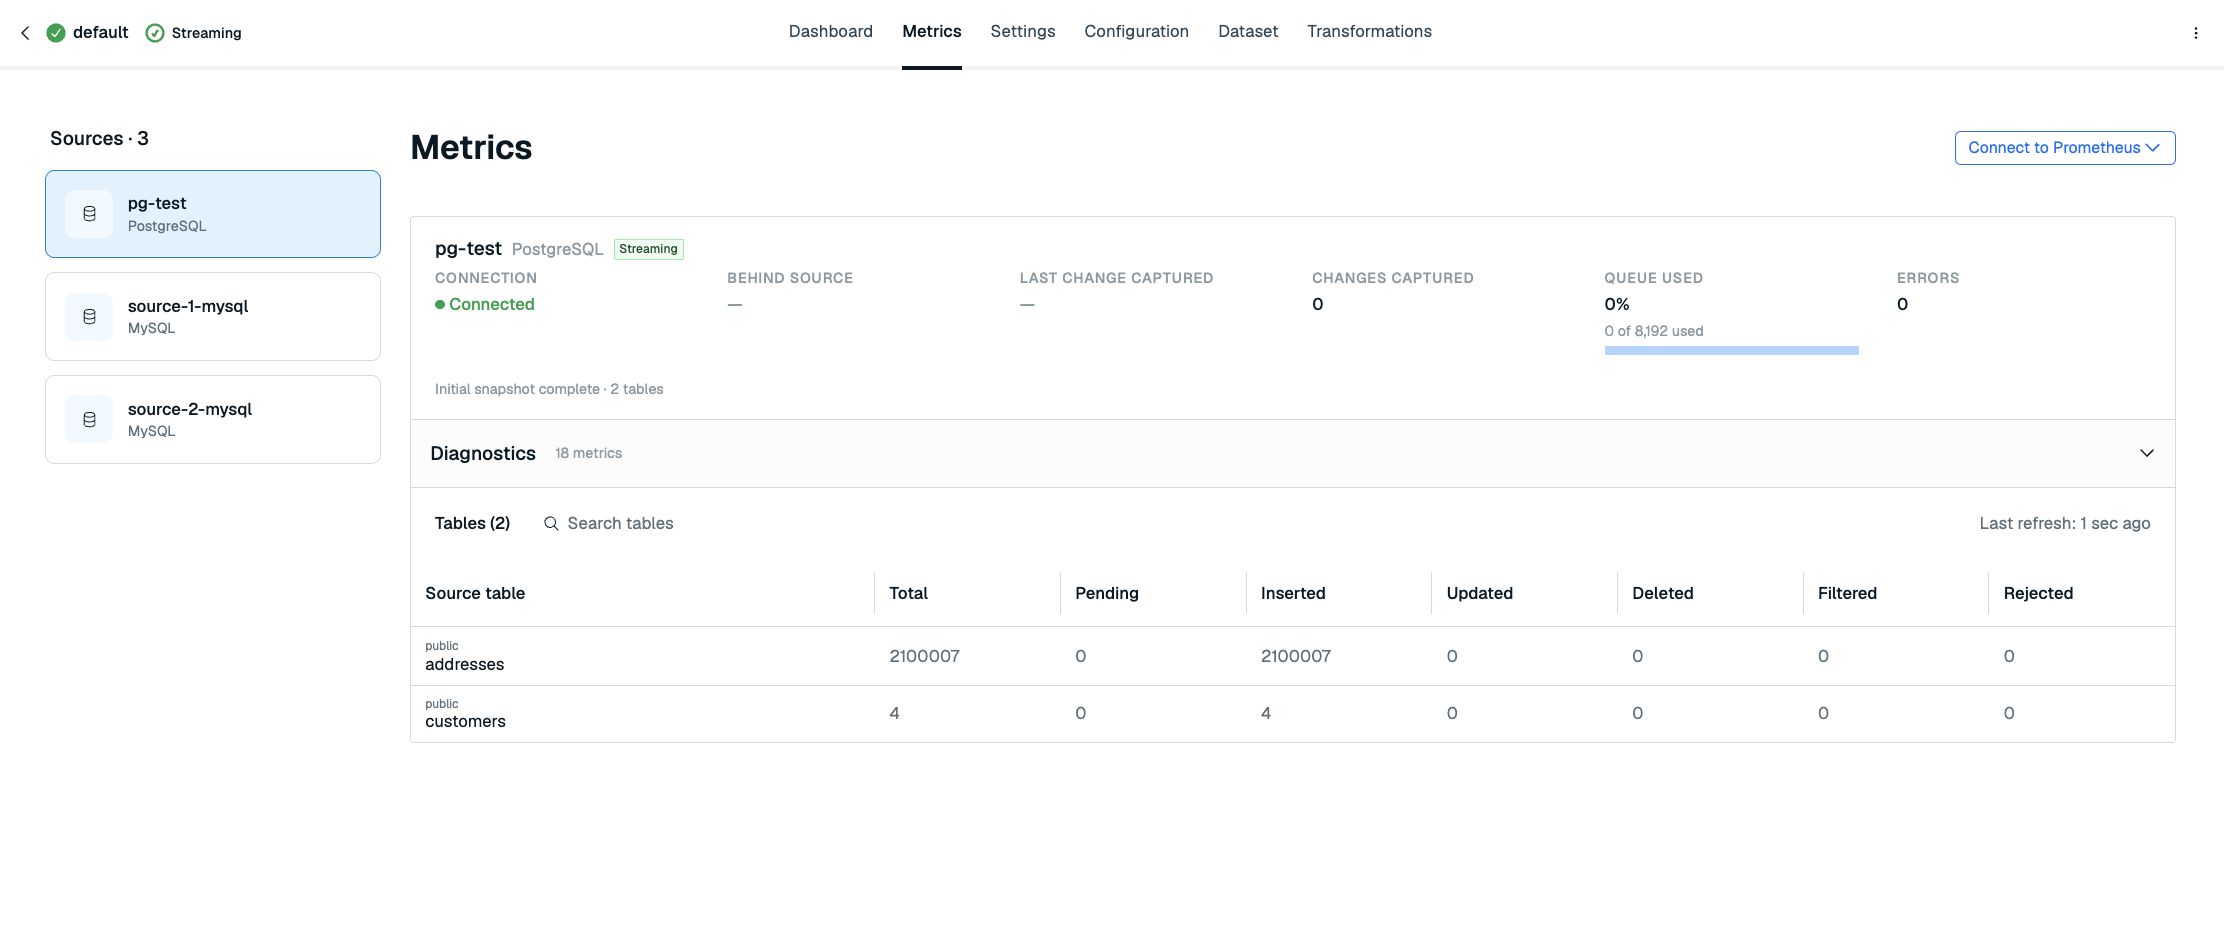
See View and edit data pipeline for source actions, dataset changes, and monitoring.
Delete sample resources
To delete the sample resources created by Terraform, run:
terraform destroy -var-file=example.tfvars